Reacting to React.js
Literally a month ago there was excitement in the Vue.js community that Vue.js got more stars than React.js on github. Stars like Hollywood stars? Really, no lol, but maybe metaphorically… or philosophically?
Github stars is a way for developers to effectively bookmark that page so that they can refer to it later on. What does this mean? That Vue’s popularity has surpassed React, a symbolic handing over of the frontend baton, if you will.
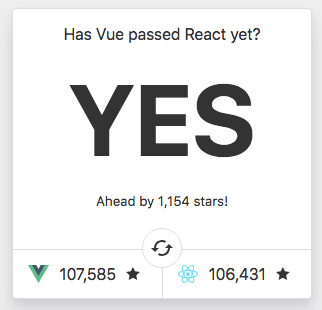
So everyone is using Vue.js and its more popular then React? Well no, stars don’t mean usage, but we can look at npm downloads which is what is used to install these and see that Vue is still pretty far behind;
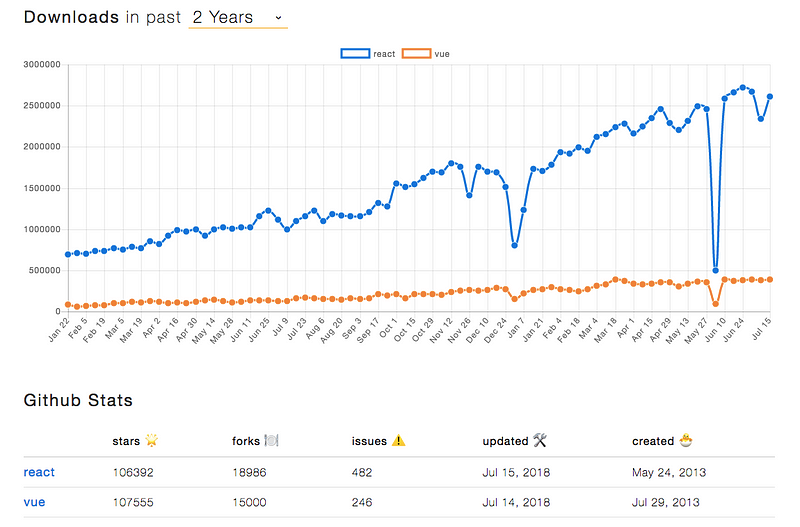
With technologies being used all the time, businesses have to decide whether it is worth their time and therefore money to upgrade to more newer ones. Trends may be all the hype, but there needs to be a pretty big reaseon to need to switch to a better technology rather then continue with their current one.
Meaning that all businesses that use React may see the advantages of using Vue, but it just isn’t worth the change and carrying on with what they have will suffice.
I thought that it would be a good idea to expand my skillset by checking out React in more detail, and see what differences it had to Vue. This is what I discovered… explained in very simple terms.
Setup — Create React App
One of the more frustrating things with learning React when starting out was using outdated tutorials. One of the biggest skillsets of developers is being able to solve problems by finding solutions online. But its also important to be aware of the age of these solutions. Quite a few tutorials were out there, but they are outdated and can lead you down a rabbit hole before realising.
Facebook’s repo
create-react-app is the best way to start. Its minimal configuration, fully templated starter kit to get you going straight away. I’m all for simple and hassle free, so this is brilliant.npx create-react-app [project name] cd [project name] npm install npm start
Four simple terminal commands to get you going!
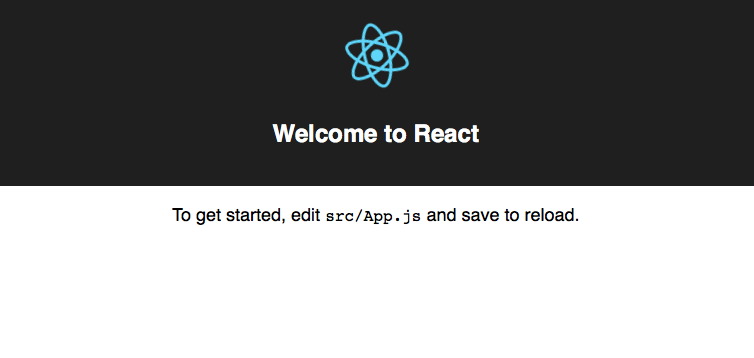
Once you npm start, a localhost server is started and you’ll see React’s example page on your browser…
Classy Structure
Man the puns! ES6 is prevalent in React, so make sure you got these down before you jump in or it will be confusing as hell!
Like Vue, we’re working with Components. Components are the whole reason we love React and Vue. We are splitting up our website into Components that are reusable. We are having our Frontend Refactored (shameless plug to my other post)!
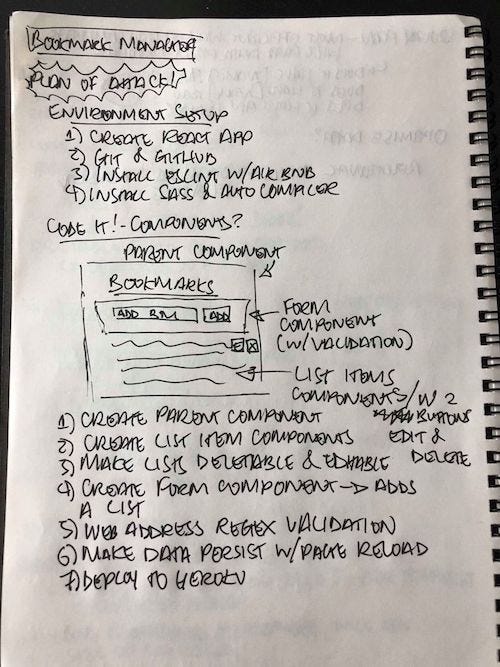
I decided to make a simple bookmark manager where a user can save these links onto a page. Remember those days when we had to do that? No? Crap, I feel old… O_o’’
Aight, lets make a plan. Like with pen and paper… you remember those things too?
import React, { Component } from 'react';
import './App.css';
import BookmarkForm from './components/BookmarkForm';
class App extends Component {
    render() {
        return (
            <div className="App">
                <h1>Bookmarks</h1>
                <BookmarkForm />
            </div>
        );
    }
}
export default App;
All components roughly follow this structure. You have your imports at the top, a component class which contains everything, then your export.
Inside the component class you will almost always have a render function which is the stuff that gets parsed to the page. The render function always returns JSX code which will contain everything you want to render.
Inside the render function here we got divs, a h1 tag, and ‘<BookmarkForm />’ which is another component.
There are also other in built functions that you can use that are on the same level as the render function, but still within the component class. You can also have custom functions that you may want to use.
Whats great is that these functions are limited to this class component scope, meaning they can only be accessed within this component, unless you want it not to do so.
Probably the most common question for learning React is… what on earth is JSX??
JSX — Everything is Javascript
ES6 controversially introduced Classes to Javascript due to demand. But really under the hood it is nothing more then syntactic sugar. Meaning it looks and acts like Classes in other languages but its actually not doing anything different then it was before.
This is the same with JSX. It acts and looks like HTML, but really its Javascript that is translated to look like HTML.
let newDiv = document.createElement('div');newDiv.className = "hello";
Is the same as
<div class="hello"></div>
JSX in its most simple terms will apply the Javascript but still look like HTML.
But in JSX class is a reserved keyword so we use ‘className’ in React as to not get it confused with actual the HTML, so for JSX we’d write it like this;
<div className="hello"></div>
Since JSX is Javascript, we would like it to use Javascript sometimes so we need some syntax to help it recognise that we wanna do that.
<div className="hello" onClick={this.clicked}></div>
Here the onClick attribute runs the function clicked created in this component when the div is clicked. As you can see Javascript is explicit for this.clicked as it is in between two curly brackets.
Passing Info Around
One of the things we wanna do in this awesome world of components is to be able to information around so that our components can be flexible.
So lets create some state(data) that will hold the list of our websites. In the class, we add the constructor to initialize our state. Super() I’ll explain later on…
class App extends Component {
    constructor(props) {
        super(props);
            this.state = {   websites: []  };
    }
    render() {
//JSX rendering stuff...
We store our state in a hash. Now calling this.state.websites will output the empty array. Props allows this information to be accessed when passed down to other components.
render() {
    let websites = this.state.websites;
    websites = websites.map((website) => {
        return (
            <WebsiteChoice
                website={website}
            >
                {website}
            </WebsiteChoice>
        );
    });
//... more JSX stuff
In the render function, we assign the variable ‘websites’ to the array in the state. Then we loop through the array with map and for each single element in the array (a website) we return the component WebsiteChoice and pass in the name of the website as a prop as a custom attribute that WebsiteChoice receives.
This sounds kinda crazy! In simple terms, this means we are passing the name of the website down to the WebsiteChoice component so that we can do something with it, and let the WebsiteChoice component handle it rather then the parent.
So in the WebsiteChoice component;
class WebsiteChoice extends React.Component {
    render() {
        return (
            <li>
                <div className="website-choice-container">
                    <span className="website-choice">
                        <a href={`http://${this.props.website}`}>
                            {this.props.website}
                        </a>
                    </span>
                </div>
            </li>
        );
    }
}
Here we pass in the name of the website by calling ‘this.props.website’ and set it to the href, and render it to the page, thus allowing this component to be responsible for anything to do with each individual website.
Save Yourself This Dot Headaches
One of the interesting parts to Javascript is using the keyword
this. This, is a way of referring to things within a certain object. This blog explains it super well.
So when we are passing around these bits of information via props, we can also pass functions too which can sit in the parent component but be called in the child component.
However, since we are passing around objects, the keyword this can be referring to the wrong objects. So its super useful to know ES6 arrow functions here, since they allow the this keyword to not refer to the function object that’s created.
So instead of
function doSomething() {
    // some code
}
use
doSomething = () => {
    // some code
}
to avoid scoping problems. This allows a child component to be able to call the passed down
this.props.doSomething from its own component.
If you remember above we had that weird ‘super’ keyword with props inside it.
class App extends Component {
    constructor(props) {
        super(props);
            this.state = {   websites: []  };
    }
    render() {
//JSX rendering stuff...
In React, when you call
super with props. React will make props available across the component through this.props. This allows us to call this.props.websites when the data is on the parent component.Deployment to Heroku
There’s a lot more to the code but this post is starting to get a bit too long. Once I was happy I wanted to see how easy it would be to upload my code to Heroku and have it working. I was interested in seeing how much configuration was needed, especially after using
create-react-app to setup my template.
I uploaded to Heroku the same way I would if I was setting up a new github repository, and followed their instructions.
Once uploaded, I soon realised that you needed to add a node buildpack, which effectively does an online npm install to install all the dependencies. This was under your app/settings on the heroku website.

Once done, voila! It was up! Super simple and really I think
create-react-app is an awesome template that helps developers right out the box. Feel free to check it out here and the github repo is here.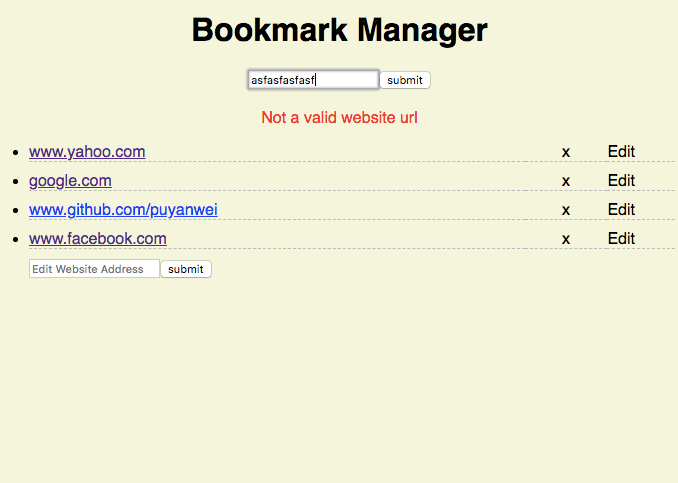
Final Thoughts
I think that React.js is a great framework and once you get your head around JSX syntax the potential is huge.
However I do think its quite hard to get into at first glance, the readability of just doesn’t compare to Vue.js and it also has some exception case rules that you basically just have to memorise like using
className instead of class which seemed like a foresight in its design that they just kept.
Documentation is ok, but there is a lot of old answers out there and there is a danger of always implementing an old way of doing things. That being said, the community is huge and with Facebook’s ‘backing’, its surely still quite a safe bet that it stick around for the foreseeable future.
I think that being able to use ES6 is almost a must for react, considering the scoping problems that you will get by using traditional non arrow function functions, dealing with putting binds everywhere to control your this’s!
For me, if Vue didn’t exist I’d probably be a satisfied developer with React, but it was hard for me to code with the knowledge that things could be done in a much easier way…
I want to end with a pretty cool series video of what its like to develop a project from start to finish, concept to working prototype. I really love the way they plan it out, and include all the blockers that they had through the process. This can give a good insight to what a developer goes through when creating a product.
No comments:
Post a Comment