Monday, 30 October 2017

The Makers Course Aftermath...

So a lot of people will be wondering, what happens once the course is over?

The basic gist of it is that we are all up in the mezzanine trying to get jobs. Once we have a job, then I guess its "officially" over?

On the morning of our final presentations, Makers careers team organise a careers fair kinda deal. Makers clients pitched to us about their companies and positions, and then afterwards we have two hours of chit chatting with them. It is quite a lot to deal with knowing we had the presentations later on, and made it almost impossible to prepare properly the night before.

It all seems rather odd, but I cant really think of another way that they would do it. There were about 10 companies ranging from big names such as The Financial Times, and the Economist, to medical themed ones based in Oxford and Cambridge (a deal breaker for most of us),  to smaller companies with interesting ideas like automated translation or statistical lifecycle social marketing.


We apply via Makers and then wait to hear back from them. I chose three but didn't get through it seems. With a lack of feedback as to why, it hard to analyse the situation and adjust.  I assume my application/meet 'n greet wasn't enthusiastic enough and I didn't make enough of an impression.

Technically I don't feel too confident. Its difficult to know how to split my time. Currently on my to do list is;

  • Make a shortlist of companies I'd be interested in.
  • Email those companies, fill in applications if there are any.
  • Look for jobs via other means, through other websites or meetups.
  • Practice tech tests.
  • Get solid with Node JS.
  • Learn React.
  • Clean up my github projects. Improve my readmes.
  • Go through old projects and /or parts of the course I didn't finish

All I know is that coming in every day is going to be better then staying at home, I can get work done and its good motivationally to have people to talk to for support. Also, there's a ping pong table! I don't really mind the travel as I can just get out my laptop and code.

On Friday I will fly to Hong Kong. I don't think I've been back to my motherland since 2010! I will be flying to Seoul on Monday for a week to visit my best friend. And since we will be stopping at Singapore, I think we are spending a few days there too on the way back.

The motherland...

I look forward to the trip, but the guilt of not job-hunting plays on my mind. Coming back on the 24th, means that I will miss the career's fair and more opportunities. I've been told that December is a bad hiring month, but it will pick up again in January.

But I'm sure there will be amazing memories from the trip. A wedding, meeting Aunties and Uncles and good friends, great food and sights, it will be interesting! I aint gonna stop coding though, as long as I have my laptop I'll happily be continuing my learning!

Last week I found out I won the blogging competition for my cohort which was nice. They had no chance. No I'm not being cocky, literally they had no chance! No one else blogged so I won by default haha! In saying that, I have been blogging weekly since the pre-course so I think I can say that it wasn't the competition that motivated me!

Next blog post looks like I'll be in Seoul, after a few days in Hong Kong, so look forward to that!

BTW, if any of you guys need/know of someone who needs a junior developer, give me a shout! I would be supppper duuuuper thankful!

Wednesday, 25 October 2017

Makers Week Twelve: Final Project - We Built Quark Text Editor in 2 Weeks

Sorry for the lateness of this post, I chose Mondays as a good time to write them because its almost guaranteed that it wont be as busy. However yesterday I was doing my applications for Makers Careers Fair jobs and the deadline was today.

Graduation pin!

REACHING THE MVP


When starting a big project like this,  we have been taught that the best approach is to make an MVP and use that as your first stepping stone. A Minimum Viable Product is the most bare bones minimal amount of your product that you can do. So for us, creating a text editor, it would be have something where we can write text on.

Things were not as simple as it seemed because we needed to test first, and we had no idea what we were meant to use for testing, let along how it works and how the syntax was written.

The Electron documentation said that Spectron was the official testing framework, so we tried to use that. However it was quite difficult in finding the elements on our page. The typical "document.getElementId()" which did exactly that didn't seem to work, because our app did not call them documents, it was called something else.

Once we did figure it out, it was Wednesday (we aimed to get it done by Tuesday), and there was high fives all round and a huge sigh of relief.
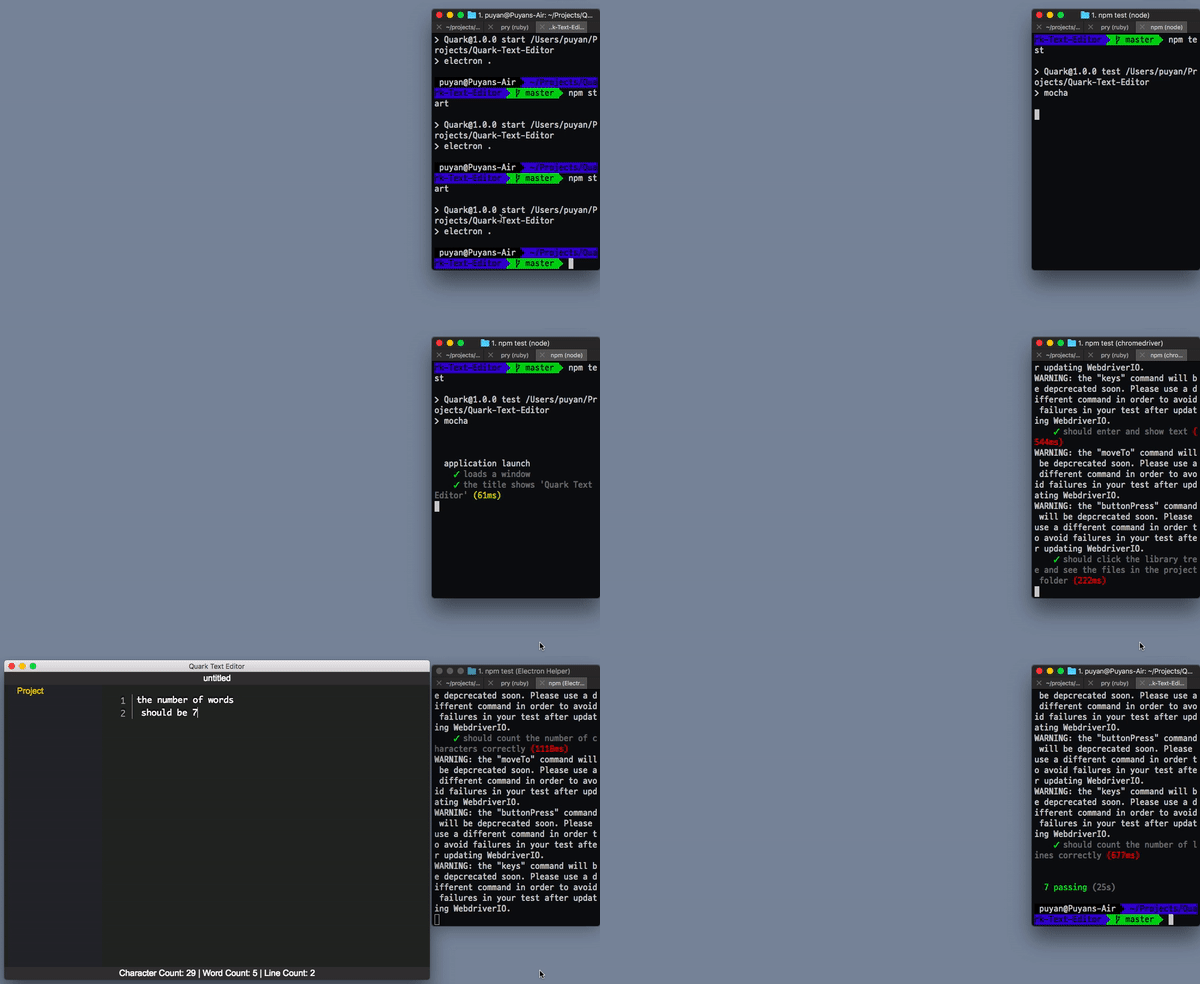
What testing with Spectron looks like!

CRUD & LS


After that, we realised that we would have to include some CRUD functionality. CRUD is another technical acronym that basically stands for "Create, Read, Update, Delete". It is a way of explaining the most common basic functionalities of all programs.

Including CRUD was difficult, as it was part of Node JS but again like many other things, we had never used it before. We would be using a module within Node called "LS" that let us move and work with files and directories.

We managed to incorporate a folder tree as well on the side. This was done by having LS look at our current directory, loop through it and put it in a list.

An interesting feature of Electron is that it doesn't have copy/paste shortcuts unless you explicitly add it in. This made is quite difficult to try and debug our problems as without it made it much longer to type in everything to check our app!

It was quite unclear as to how or where to incorporate it into our app. When it came to testing, it was rather problematic because Spectron did not seem to have the ability to click on prompt boxes when you wanted to imitate a save or load. 


THE CURSED CURSOR


Probably the most time spent on anything was trying to get our cursor to behave the way we wanted it. There became deja-vu type memorise of the dreaded apostrophe again, but to this that was nothing in comparison.

The bane of our existence, for this project!


What was happening was that on every keystroke we applied Prism.js, which was our syntax code highlighter. This library looked at the text, and through looking at the various patterns it would be able to recognise which coding language was being written.

However, everytime we ran this program and then told the cursor to go back to the editor afterwards, it would always return back to the top left. This meant that it would always end up typing bac
kwards!

We probably spent over a third of our time trying to figure a workaround to this problem. The worst case scenario would be that we would just have button on the page that you could click instead.

On Day 8 (its a 10 day project!), we got a breakthrough and got it to work! We had to have code to keep track of the cursor's position, then when it got reset move it back to where it was. Its quite amazing to see the final product how it looks like nothing is happening! But so much blood, sweat and tears went into solving this bug!
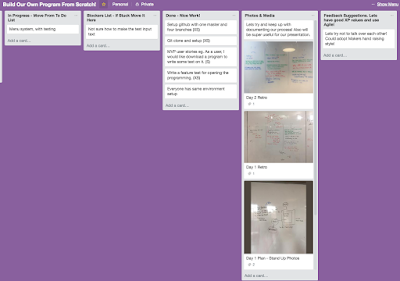
We used Trello to help us organise our project. That syntax bug on the todo list for so long!


FINAL PRESENTATION


It was really amazing to see how we managed to pull things through last minute. I mean, we were super last minute! The demo video was shot like 2 hours before the final presentation, we had to fix a lot of bugs the night before, so shooting the video became very late.

I felt bad for my colleague, who was in charge of presenting the demo because he had nothing to work with which made it difficult to practice. We probably did about 10 different recordings before we were happy and then I had to edit it on iMovie and upload it to slides.com.

For a 90 second clip, for no apparent reason apart from being totally trolled, iMovie seemed to want to take like 20 minutes to render the clip!

The presentation went really well, it was great to not only see our group do so well, but the whole cohort step up with their projects too! Its quite strange to finally have our own final project be shown, since I've been to about four graduations, but I'm honoured to have been a part of this, and also be the last cohort to only have one coach.

Here are the projects from Blue-July Cohort 2017!

QUARK TEXT EDITOR A much, much smaller version of Atom (get it?), text editor for writing code. Built using Electron, which is HTML, CSS and Node JS.


Check out a bigger image here - https://github.com/puyanwei/Quark-Text-Editor

MOO-MOOD - An iPhone App built using Swift, which records your mood and translates it into useful data. Also includes a machine learning messenger to chat to!


https://github.com/jenniferbacon01/moomood

HELLO WORLD - An auto translating messaging tool built in Python. Now a Chinese person can talk to an Argentinian person, both speaking in their own dialects!


RECURRIO - A prototype of a product in which items on a tray can automatically tell if they are empty, in order for products to be reordered automatically. Built using an Arduino board with sensors, as well as an iPhone app built in Swift.

https://github.com/alessiobortone2/Recurrio3 and https://www.whitesurwhite.com/recurr


AFTERMATHS

Well now that its all over what happens now? Jobhunting! On the day of the presentations there were a bunch of companies that came and pitched to us. We chose some, and have been spending some time filling out their applications.

If we are successful, we will be doing tech tests, and interviews. Our time will be spent possibly looking at other job prospects, learning other languages (React seems like its everywhere), or fixing up our old projects/doing new ones.

The awesome space for graduates to job-hunt or work in

I have two weeks until I go to Hong Kong, Seoul, and Singapore so if I can land a job that would be great! But no doubt about it, I'm hooked to coding and creating new things so I'll never stop!

Hopefully I'll keep up the blogging, I'm really glad I've gotten back to it, there are some fantastic memories to look back on and reflect.

Tuesday, 17 October 2017

Makers Week Eleven: Final Project - Lets Try 2 Build Atom!

So as I'm writing this on the Monday I'm officially starting Week 12, and Friday will be the end of the course. We will present our projects to a crowd a few employers, plus the mid and junior groups, and possibly some family and friends.

Its weird after watching about 4 of those that we'll actually be the next ones up there!

I will be sad when its over, as much of a roller coaster it has been I've loved it and the coaches are amazing, and they've really done a great job of creating an awesome community.

Geeking out, putting the big screen to good use after a hard day's work of coding!

IDEAS, IDEAS, & MORE IDEAS


The project actually started last week when I was writing about the tech tests. In fact, we got given our groups and had decided on the project the Friday previous, so we had already gotten in some weekend studying.

From the previous project, I had decided that since I was bursting with so many ideas lol, that any time I would have a thought I'd write it down on my phone for the ideas workshop.

So since I was 'prepared', it meant that I had pretty much taken up a lot of the whiteboard of potential ideas. I think I ended up with about ten ideas that made the board.

All our ideas were collated into groups and then we voted our first and second preferences. Groups were made of first choices, if it was possible.


Some crazy and/or ambitious ideas, focusing on being general for tech flexiblity

Final groupings of ides were Games, Product, Learn to Code, Build Your Own, and 'Other'
Learning from my success of the Pokemon Game for the iPhone, I decided that it was a good idea to keep my ideas general and that they would be based on what I wanted to try out.

In the end, I decided that it would be cool to try to build something from scratch. I've always wondered what it would be like to build a program, so this is a fantastic chance to find out!

My ideas in caps and mega black, ambitious enough? lol

UP AND ATOM!


After a discussion with our assigned "Build Your Own" categorized group, we decided that we would try and build the famous (in the coding community anyways) code editor Atom! And in case that was too easy, we also wanted to have multi user live functionality. We R madddd!

One of the cool things we found out was that Atom was open source, meaning that their code was freely available for anyone to use and learn from.

Another awesome thing that we found out was that Atom was built using something called Electron. Electron, we found out built other apps such as our messenger app Slack which we use extensively at Makers, my favourite Streaming site Twitch, Wordpress, and so much more!

So how does Electron work? Well, in simplemens terms, build you app as if it is a website, and then it will convert it!

Chromium is Google open source front end app, Node JS is a back end server side framework.

If you wanted a button that would go to another part of your app, make a webpage that does exactly that. This means that anyone that works with websites has the ability to make some apps!

This means that the language is in HTML, and logic is in Javascript. Simples.

However, testing was another matter. We found its official testing framework called Spectron, which runs the app as if it is a user to test out our various features. We had quite a lot of trouble working out how the language worked, as it was a little different to Javascript.

Anyways I'm quite tired now, its been quite a roller coaster so far. I'll keep trying to post on Mondays... it might be harder to find topics to talk about, but we'll see. For now enjoy our buzzword dinosaur... hopefully soon we will find developer jobs but I hope we don't end up at workplaces where they talk like that all day in meetings!

Tuesday, 10 October 2017

Makers Week Ten: Top Quality Code Innit!


This post might be a bit more technical then my usual, but I will try and explain things as layman's as possible. Also to the current or potential Makers this might need a spoiler alert, but don't worry in true Makers style I wont give you guys the answer lol.

BANK PROGRAM EZ? NOT SO FAST...


This was the task we were given to do. Once our coach approved our code, we moved onto the next one;


You can go to your terminal in a mac, gem install ruby, type in irb and copy and paste this code in if you feel like checking it out...

Ok, lets have a go;


class Bank

  def initialize
    @transaction_history = []
    @balance = 0
  end

  def deposit(date, credit)
    @balance += credit
    transaction = Transaction.new(date, credit, 0, @balance)
    @transaction_history.unshift(transaction)
  end

  def withdrawal(date, debit)
    @balance -= debit
    transaction = Transaction.new(date, 0, debit, @balance)
    @transaction_history.unshift(transaction)
  end

  def print_balance
    puts 'date || credit || debit || balance'
    @transaction_history.each do |log|
      puts "#{log.date} || #{log.credit} || #{log.debit} || #{log.balance}"
    end
  end
end

class Transaction

  attr_accessor :date, :credit, :debit, :balance

  def initialize(date, credit, debit, balance)
    @date = date
    @credit = credit
    @debit = debit
    @balance = balance
  end
end

With every new Bank we create, we create an array (essentially a list) called transactions history that will hold our data stored in the Transaction class. Every time a deposit or a withdrawal happens, a new transaction is added to the array with the relevant information.

Our balance is always updated by having the deposit/withdrawal number add or deducting to it.

When we go for the printing of the balance, we look loop through each transaction in our transaction history array, and output all the relevant information.

Ok, so lets call our methods;


bank = Bank.new
bank.deposit("10/01/2012", 1000)
bank.deposit("13/01/2012", 2000)
bank.withdrawal("14/01/2012", 500)
bank.print_balance

pry(main)> bank = Bank.new
=> #<Bank:0x007fca05119488
 @balance=0,
 @transaction_history=[]>
bank.deposit("10/01/2012", 1000)
=> [#<Transaction:0x007fca050e9c60
  @balance=1000,
  @credit=1000,
  @date="10/01/2012",
  @debit=0>]
bank.deposit("13/01/2012", 2000)
=> [#<Transaction:0x007fca050787e0
  @balance=3000,
  @credit=2000,
  @date="13/01/2012",
  @debit=0>,
bank.withdrawal("14/01/2012", 500)
=> [#<Transaction:0x007fca0612c280
  @balance=2500,
  @credit=0,
  @date="14/01/2012",
  @debit=500>,

bank.print_balance
date || credit || debit || balance
14/01/2012 || 0 || 500 || 2500
13/01/2012 || 2000 || 0 || 3000
10/01/2012 || 1000 || 0 || 1000

Seems like it works, but that's not enough... this is actually low quality code!

QUALITY CONTROL


Extra software tools were given for us to try and pass them, to assure high quality code.

There are multiple things wrong with this code, so what are they?

Testing - Well yeah, there is no testing on this code whatsoever. Testing is super important as not only does it help you work out what is wrong with the code, but for refactoring (rearranging the code for improvement) it makes it much less confusing!

The quality of the tests are important too. Do they properly test what you set them out to do? A way of testing if the tests are solid are by either slightly changing them to see if they fail, or just adding things to the code that should make them fail.

Ruby Testing Tool - RSpec

It is also important that the coverage is over 95%. This means that the tests you do, cover 95% or more of the code that is written.

Coverage Tool - SimpleCov

Linting - This is looking at the formatting of the code and to see if it is consistent. This can be anything like the spacing of words, upper or lower casing, or even preferred coding conventions for a particular job of a bit of code. The lint checker Rubocop also has a feature to auto correct fails if its sure it doesn't effect the function of the code.

Linter Tool - Rubocop

Inbalanced Classes - The main problem with the code above is that there are only two classes and that basically all the functionality is in one. It is important to spread of the responsibility of the code into multiple classes, with each class making it clear what its role is.

Having code spread out also makes it better for debugging, and it makes sure that the classes aren't too reliant on each other, meaning if something broke then it shouldn't effect to many things.

We used Flog to check our complexity (in terms of the structure), and aimed for a score of no higher then 15 for classes and no higher then 6 for each method.

Code Structure Assessment Tool - Flog

Extras - There are a lot of small things to do as well for good coding practice. Things like;

  • Methods should only have one sole function
  • Avoid Repetition "DRY" (Don't Repeat Yourself)
  • Naming Conventions - Classes should be nouns, methods as verbs
  • Setting some methods to not be allowed to be accessible by the user, making them "private"
It was also good practice to use Github with quality in mind;
  • Lots of commits!
  • Detailed descriptions on the commits.
  • A detailed Readme file.
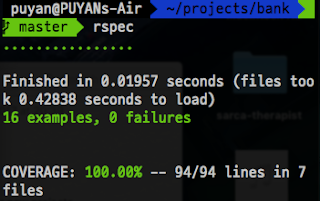
In the end, I managed to refactor my code into 6 classes, linter passing and had 16 passing tests at 100% coverage! It was frustrating at times, but a great exercise none the less to making myself go back and rethink about how my code could be improved. I learned so much last week!


THE END IN SIGHT


So we have two weeks left of the course and now I'm doing my final project. My group and I all had an interest to build a desktop app from scratch, and so we have been checking out and learning how to use Spectron. It seems like an amazing framework and has tons of potential for future projects. 

More about that next week. I cant believe its nearly over!! I'm gonna be really sad... For now I'll leave you guys with what should have definitely been our final project, an Augmented Reality Mario remake!


Tuesday, 3 October 2017

Makers Week Nine: We Built an Iphone Game in 5 Days with No Prior Knowledge

This is a long ass post, so if TL; DR scroll to the bottom, check out the gif of our game.

Last week it was our mini mock final project. We came up with a bunch of ideas, rounded them down and then got given our our groups, and then within it we picked one of them to do;


P-YAN AN IDEAS MAN?


I've always prided myself on being an ideas guy. Its the execution i'm lacking in. So when the time came for us to submit our ideas I kinda felt that I should be able to get one through. Each student picked 3 and then they got rounded down.

"DING!"

My 'strategy' was to pick something that was general enough to be open, but also have a specific thing in mind that could be cool. I think good ideas at this stage can be broken down by answering the following questions;

  • Is there a particular thing you'd like to try out and explore?
  • At the end of it, is it possible to have something tangible to show for it?

Two outta three of my ideas got picked to the final choices, and our group unanimously agreed that we wanted to make a iPhone game. Here's my ideas anyways, with those criteria in mind;

  1. iPhone game using the tilting motion - We wanted to try out making a phone app, and a game and use the gyrometer feature. And we'd have a cool app on our phone to show for it afterwards.
  2. Chrome extension which funks up the pages 80s style - Could be cool to try and make a Chrome extension plugin. The Chrome extension could branch out into any other idea. At the end of it you could have something that you could share with others and let them download and install it to see for themselves what it does.
  3. Machine learning pathfinder for London Underground - My weakest idea tbh, as I had already seen it done before, but thought it could be a cool thing to expand upon. But machine learning is a hot topic these days, but this idea for sure doesn't seem to have the accessibility or fun of the other two. 


WHERE 2 START


Starting out projects like this always seems pretty overwhelming at the beginning. The important thing is to identify what needs to be done and plan for the future;

Make a Plan! - Super important to get things going. What programs are we going to use? What is our testing framework? The first aim is to get a MVP completed, ie a Minimum Viable Product. For us, this would be a ball on the screen that would move around due to tilting the phone.

Original planning page from Day 1

Ironically, Swift was chosen by our group in no time at all. It was either that or React Native, and with our coach's advice that's what we went with.

Setup The Environment - We want to get our Github repository setup, download all the relevant softwares and set it up ready to be used. This can take a lot longer then anticipated especially when working with stuff that we've never used before.

The super intimidating user interface of XCode!

Agile Setups - Set up a plan of when to do morning stand ups and end of day retros. These are plans for the day and end of day evaluations. These are super useful to keep things in perspective and take a step back to remind ourselves what we're doing. Direction can be easily lost sometimes when members are super immersed in their work.

Day 2 Retrospective - The Good, The Bad, and the Confused?


Setting up XCode is a pain in the ass. You have to go to the Apple Developer page, sort out sign ins, and fill out forms. Once done with those, you have to do more downloads and then select an extra option on your phone to activate it once it downloads.

For some reason, my developer account had issues where it'd never save my sign in, so I'd have to do it like every time! Super annoying...

Bane of my existence this week

On day 2 we made an executive decision to switch from Swift 3 to Swift 4. Swift 4 had just been released the week before, so we thought it would be better to work with Swift 3 because there'd be more documentation on it.

However, after a few of us realising that our newly updated OS11 iPhones weren't compatible with Swift 3, we decided to go for Swift 4. Another incentive was also the fact that after this project, if we decided to try out more apps we would have to learn Swift 4 anyways, so its more beneficial.

End of day 2 we managed to finish our MVP. We found a good spaceship tutorial which used the gyroscope movement and adapted that code into ours. We found a Pokeball sprite that we could use, and so that was the beginning of our Pokemon themed game...


XCODE TESTING IS AWFUL


From my limited experience of checking out maybe five(?) testing frameworks, XCode's XCTest was by far the worst.

  • Interface - XCode is pretty UI intensive, meaning that you have to use their software to do everything. I found it pretty overwhelming, as they had gone completely nuts with the amount of options for everything. I'm not talking options for properties of things that you create, but the actual user interface itself! This means its not intuitive at all and just finding the tests themselves was confusing enough, let along knowing how to run them!
The tiny diamond button shows your tests! Hovering mouse over test icons reveals play button to run your tests!

  • Speed - Every time you ran a test, XCode built the app. This meant every time you ran a test it would take at least 20 seconds, which is just insane if you compare it to the instant results you get from other testing frameworks.
  • Visibility - We did not realise there was a console that outputted messages until day 3! The console was also quite random too, sometimes displaying a message when there was an error, and other times not showing anything. We never understood this in the end.
  • Testing Games is Hard - Since the other groups also did games, this became a common theme in the groups. Most groups worked with looping frames to get the animations to interact, and so once their game started, you cannot simulate what is going on within a controlled environment. This is especially true because most games have a ton of randomness in them.
  • Testing Tilt Motion is Hardest - So super how do you test tilting a phone motion? XCode has a simulator phone that you can use, but after some research it was discovered that simulating the tilt on your computer is just not possible.
#fml

  • Record Button Saved the Day - We found a record button on day 4 lol, and that wrote down in the code what was being pressed etc. This was great because it finally gave us some insight into what the objects were called for the testing framework. With this feature, we managed to pull off some tests finding elements in our game.


SMALL THINGS COUNT


Looking back at the Acebook week, I think we learned a lot from it actually. Adding in smaller features at a time and refactoring the code was super helpful, especially for splitting up the work between different people in the group.

When adding the enemy Team Rocket, in typical fashion they caused complete mayhem. For some reason when they appeared on top of our border, the game would instantly be over and we just couldn't work out why.

Typical Team Rocket causing tons of trouble for us!

So as a purely coincidental decision nothing to do with that at all, we decided to get rid of the borders and make it an Astroids style thing where if you go left off the screen you would appear on the right, and vice versa for up and down. This actually made the game more fun!

Outtakes showing our bugs!

I looked at previous presentations and wrote a rough outline for the group to participate in. Structures are basically the same, so it was pretty easy to prepare.

I had also overheard that doing live tech demos are basically banned for final projects, they're always videos, as too many times things have gone wrong. So I insisted that we include a video.

It was also kinda weird to think about how one would go about presenting a game which involved tilting. Showing a screenshot of the game (great timing for that new feature, Apple) would be good, but it wouldn't show the physical tilting of the phone.

I kinda thought about having a split screen and after some quick googling I realised it was pretty easy to do in iMovie. Just needed to synch things up and it'd be great. It worked like a charm...

Its POKEBALL RUN! Coming to the App Store soon!

Our presentation went really well, and we achieved so much within 5 days. This was one of my favourite projects so far. I hope that with the final project it will be similar in trying something new and interesting.

Check out the Github Repo, there are instructions to play the game yourself but be warned you will have to go through all the Apple Developer stuff, as well as downloading XCode etc!